
Studying in Canada offers students not just academic opportunities but also a chance to build real-world entrepreneurial skills. With flexible schedules, access to both culture and Canadian communities, and strong DIY instincts, you’re well-positioned to transform a simple hobby into a business. Whether you’re into baking, crafting, or creating fragrances, there’s potential to turn your creative spark into something profitable. Here are three home-based business ideas that seamlessly blend culture, passion, and income, each fully manageable from the comfort of your Canadian home.
If you are interested in being a professional perfumer, check out our post: How to Become A Perfumer.
3 Unique Home-Based Business Ideas to Kickstart in Your Free Time
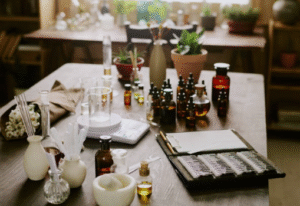
1. Start a Signature Scent Line: Craft & Sell Homemade Perfumes
If you’ve ever considered exploring the art of scent, perfume making is an ideal creative business. With easy access to online perfume making courses, you can master the basics quickly and begin formulating your own blends inspired by florals like jasmine, sandalwood, or rose.
Perfumes can be packaged in small, elegant bottles and marketed as “handcrafted inspired scents.” This niche appeals to both expats and Canadians interested in exotic, natural products. Selling on platforms like Etsy, Instagram Shops, or within university cultural groups can help build early traction.
| Item | Purpose | Approx. Cost (CAD) |
|---|---|---|
| Essential Oils | Core ingredients for fragrance | $10 – $40 per bottle |
| Perfumer’s Alcohol | Base for dilution | $20 – $30/litre |
| Glass Bottles | Packaging | $1 – $3 each |
| Online Course | Skill-building | $50 – $150 |
Step 1: Gather Your Supplies
Before you start, make sure you have the right tools and ingredients:
- Tools: Glass perfume bottles, glass dropper, funnel, measuring spoons, notebook.
- Ingredients: Essential oils (Top, Middle, Base notes), perfumer’s alcohol or vodka, distilled water (optional), fixative (like glycerin or benzoin).
Tip: Consider enrolling in a perfume making course to master the fundamentals.
Step 2: Understand the Fragrance Pyramid
Perfumes are typically structured using three types of scent notes. Follow a 30:50:20 ratio (Top:Middle:Base).
| Type | Role | Lasts For | Examples |
|---|---|---|---|
| Top Notes | First impression | 15–30 mins | Citrus, mint, lavender |
| Middle Notes | Heart of the scent | 2–4 hours | Rose, jasmine, cinnamon |
| Base Notes | Depth & longevity | 4–12+ hours | Sandalwood, vanilla, patchouli |
Step 3: Create Your Formula
Choose 1–2 oils from each category and mix in this suggested ratio for 10 ml of perfume:
- Top Note: 9 drops (e.g., bergamot)
- Middle Note: 15 drops (e.g., jasmine)
- Base Note: 6 drops (e.g., sandalwood)
Combine essential oils in a clean glass bottle and swirl gently.
Step 4: Add the Alcohol Base
Add 5–7 ml of perfumers alcohol or high-proof vodka. Add 1–2 drops of fixative to help the scent last longer. Swirl again to blend thoroughly.
Step 5: Let It Mature
Seal the bottle and store it in a cool, dark place for at least 48 hours, ideally 2 to 4 weeks, for the scent to fully develop. Shake gently every few days.
Step 6: Filter (Optional)
If the mixture is cloudy, you can filter it through a coffee filter or cheesecloth. This step improves the appearance but is optional.
Step 7: Bottle & Label
Use a funnel to transfer the matured perfume into a final perfume bottle. Don’t forget to label it with the name, ingredients, and date of creation.
Step 8: Test & Refine
Spray lightly on your wrist to test the scent. Take notes and tweak your formula for future batches based on your observations.
Starter Essential Oil Combinations
| Perfume Theme | Top Note | Middle Note | Base Note |
|---|---|---|---|
| Fresh Citrus | Lemon | Lavender | Cedarwood |
| Floral Delight | Bergamot | Rose | Patchouli |
| Oriental Spice | Sweet Orange | Cinnamon | Sandalwood |
2. Turn Ambiance into Income: Make & Sell Handmade Candles
The coffee and candles lifestyle is in full swing across Canada, making this a timely business idea. Handmade candles, especially pillar candles, aromatherapy types, or culturally themed ones, sell exceptionally well in student markets, craft fairs, and online marketplaces.
Start with simple supplies like soy wax, essential oils, and reusable candle molds. You can introduce inspired variations like cardamom-rose or sandalwood-lavender blends. Popular seasonal candles also present opportunities to capitalise on holiday themes.
| Type | Fragrance | Occasion | Target Market |
|---|---|---|---|
| Pillar Candles | Spiced Chai | Home Decor | Desi Millennials |
| Tea Lights | Jasmine | Festivals | South Asian Families |
| Jar Candles | Vanilla & Rose | Self-Care | University Students |
Step 1: Choose Your Candle Type
Before you start, decide what kind of candle you want to make. Popular types include:
| Candle Type | Description | Ideal For |
|---|---|---|
| Jar Candles | Made in glass jars | Safe, beginner-friendly |
| Pillar Candles | Stand-alone candles | Decorative, advanced molds |
| Tea Lights | Small, round, used in holders | Quick use, small batches |
| Scented Candles | Infused with fragrance oils | Aromatherapy, gifts |
| Layered Candles | Multi-coloured layers in jars or molds | Custom aesthetics |
Step 2: Gather Your Materials
🧂 Ingredients:
- Wax: Soy wax, paraffin, beeswax, or coconut wax
- Wicks: Pre-tabbed cotton or wood wicks (choose based on candle diameter)
- Fragrance oil: Optional, choose candle-grade oils
- Colorants: Optional (liquid dyes, dye chips, or mica)
- Additives: Essential oils, dried flowers (use with caution)
🛠 Tools:
- Double boiler or microwave-safe jug
- Stirring stick or spoon
- Thermometer (for wax temperature)
- Scale (to measure wax and fragrance)
- Candle molds or jars (e.g., mason jars, ceramic holders, candle molds)
- Wick centering device (pencil, chopstick, or clips)
- Glue dots or hot glue gun (to fix wicks)
Step 3: Prepare Your Workspace
- Cover your work area with newspaper or baking paper.
- Ensure jars or candle molds are clean and dry.
- Secure wicks in the center of jars/moulds using a glue dot.
- Use a wick holder or chopstick to keep the wick upright.
Step 4: Melt the Wax
- Weigh the amount of wax you’ll need. A typical 8 oz jar needs about 200g of wax.
- Use a double boiler method or microwave in short bursts.
- Heat wax to about:
- Soy Wax: ~80°C (176°F)
- Paraffin: ~90°C (194°F)
- Beeswax: ~65–70°C (149–158°F)
📌 Safety Tip: Never leave melting wax unattended. Use a thermometer to avoid overheating.
Step 5: Add Fragrance and Colour (Optional)
- Allow the wax to cool slightly (~65°C or 149°F).
- Add fragrance oil (recommended load: 6–10% of wax weight).
- Stir gently for 1–2 minutes to fully incorporate.
- Add colouring (if desired), stir until fully dissolved.
Step 6: Pour the Wax
- Slowly pour the wax into your jars or candle making moulds.
- Leave about 1 cm space at the top.
- Ensure the wick remains centered, adjust if necessary.
- Tap gently to release air bubbles.
Step 7: Curing and Setting
- Let the candles cool and solidify at room temperature for at least 6–12 hours.
- Avoid moving the container while the wax is setting.
- For scented candles, allow to cure for 3–7 days before burning to maximize scent throw.
Step 8: Trim the Wick and Test
- Trim the wick to about ¼ inch (6–7 mm).
- Do a test burn: let the candle burn for 2–3 hours and check for:
- Clean burn (no tunneling)
- Good scent throw
- Steady flame
Step 9: Decorate & Label (Optional)
- Add custom labels, stickers, tags, or dried flowers (outside the jar).
- Note down scent name, burn time, safety instructions.
🎯 Recommended Wax Types Comparison Table
| Wax Type | Burn Time | Scent Throw | Eco-Friendly |
|---|---|---|---|
| Soy Wax | Long | Moderate | ✅ |
| Paraffin Wax | Medium | Strong | ❌ |
| Beeswax | Longest | Subtle (natural scent) | ✅ |
| Coconut Wax | Medium | Excellent | ✅ |
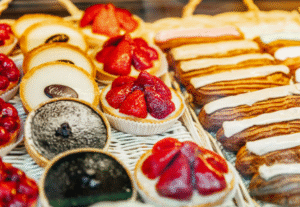
3. Bake with a Desi Twist: Launch a Small Batch Home Bakery
If your strength lies in baking, consider turning your kitchen into a mini-commercial bakery. From fusion cupcakes to desi-flavoured cookies, students can serve a niche audience that craves familiar tastes in a foreign land. Start with a clear bakery items list and focus on the most profitable bakery products like mithai-inspired cheesecakes or masala muffins.
Investing in a basic commercial bakery oven (or using a reliable home convection oven) is a must for consistent quality. Don’t forget food safety regulations: in provinces like Ontario or British Columbia, you’ll need to check local cottage food laws.
| Product | Main Flavour | Price (CAD) |
|---|---|---|
| Gulab Jamun Cheesecake | Cardamom & Rose | $7/slice |
| Masala Chai Muffins | Tea Spice Blend | $3.5 each |
| Rasgulla Tarts | Rose & Milk | $5 each |
Step 1: Define Your Niche and Menu
Choose a niche based on your passion and the market demand. Focus on items that are both popular and feasible to make in your home kitchen.
Popular home bakery niches include:
- Custom cakes and cupcakes
- Artisan breads
- Cookies and brownies
- Vegan or gluten-free baked goods
- Indian fusion treats (e.g. Gulab Jamun Cheesecake)
Example bakery items list:
| Product | Price (CAD) | Prep Time | Profit Margin |
|---|---|---|---|
| Chocolate Chip Cookies (6 pcs) | $8 | 30 mins | 60% |
| Custom Cupcake Box (4 pcs) | $12 | 45 mins | 55% |
| Desi-Style Cheesecake | $28 | 1.5 hrs | 50% |
Step 2: Set Up Your Home Kitchen for Baking
You don’t need a professional kitchen, but your space must be clean, organized, and safe.
Basic equipment for a home bakery:
- Oven (convection preferred)
- Commercial bakery oven (optional, for large batches)
- Mixing bowls and stand mixer
- Measuring cups and kitchen scale
- Baking trays, pans, moulds
- Piping bags and nozzles
- Cooling racks and packaging materials
Step 3: Register and Understand Home-Based Food Business Laws
In Canada, food businesses must follow federal and provincial guidelines. As a home-based bakery, you’ll likely need:
- Business Registration: Register your business name
- Food Handler Certification: Often required by local health authorities
- Home Kitchen Inspection: Depending on your province
- Liability Insurance: For protection against food-related claims
Check with your province (e.g. Ontario, British Columbia) for region-specific home bakery laws.
Step 4: Pricing Your Bakery Products
Consider ingredient costs, preparation time, packaging, delivery, and competitor pricing.
Pricing formula:
Cost of Ingredients + Labour + Overhead + Profit Margin = Final Price
For example:
- Ingredients: $5
- Labour (1 hr @ $15/hr): $15
- Overhead (utilities, packaging): $2
- Profit (20%): $4.40
- Total: $26.40 → Round to $27
Step 5: Create Your Brand Identity
Build a memorable brand that reflects your style and target audience.
- Choose a unique business name
- Design a simple logo using tools like Canva
- Define your tone: fun, elegant, desi, eco-friendly, etc.
- Package your items consistently with branding (stickers, tags, ribbons)
Step 6: Set Up Online Presence and Ordering System
Use free or low-cost tools to start promoting your business:
- Create an Instagram and Facebook page
- Post daily reels, behind-the-scenes, and customer feedback
- Accept orders via WhatsApp, Instagram DM, or Google Forms
- Eventually build a simple website or Shopify store
Step 7: Promote Locally in the Student & Family Community
Leverage your community and networks to spread the word:
- Offer first-order discounts to students and families
- Participate in local student fairs, Diwali/Eid/Mela markets
- Partner with local grocery stores or tiffin services
- Encourage word-of-mouth marketing with referral codes
Step 8: Manage Orders, Delivery & Feedback
Good customer service keeps your business growing. Here’s how:
- Confirm orders in writing (via message or email)
- Label and pack items neatly with allergen warnings
- Offer local delivery or pickup options
- Ask for reviews and repost them on your social media
Step 9: Track Sales and Plan Growth
Use basic Excel or free accounting apps to track income, costs, and popular products.
- Track which bakery products sell the most
- Keep receipts for all ingredients and supplies
- Plan promotions around festivals and holidays (e.g., Rakhi boxes, Christmas cupcakes)
- Gradually invest in better equipment or bulk ingredients to cut costs
Some Essential Tools for a Home Bakery
| Tool | Purpose | Recommended Brand |
|---|---|---|
| Stand Mixer | Mix dough and batter efficiently | KitchenAid, Hamilton Beach |
| Oven Thermometer | Ensure accurate baking temperature | OXO, CDN |
| Piping Kit | Decorate cakes and cupcakes | Wilton, Kayaso |
| Commercial Bakery Oven | High-capacity baking | Unox, Waring |
🎯 Final Tips for Home Bakery Success
- Start with 3–4 items on your menu, master them, then expand
- Keep quality consistent and respond to feedback quickly
- Use social media for storytelling, not just selling
- Consider bundling items (e.g. cookie box + greeting card)
- Celebrate small wins and always track repeat customers
How to Promote Your Home Business in the Student Community
Leverage your network in Canada through student WhatsApp groups, university Desi clubs, and cultural festivals like Diwali, Navratri, or Lohri. Offer limited-edition product drops or student discounts to get early traction. Collaborations with Desi food influencers or local grocery stores can also help expand visibility.
As an student in Canada, you’re already part of a vibrant, hyper-connected community that’s ripe for grassroots marketing. The key is to strategically leverage cultural familiarity, digital connectivity, and local micro-influencers to build awareness and early adoption for your home business.
1. Activate WhatsApp Groups and Student Networks
Most students in Canada are part of multiple WhatsApp groups, be it for university programs, housing, or Desi meetups. These are your instant, zero-cost marketing channels. Start by:
- Sharing product previews and limited-time offers with exclusive codes.
- Asking admins for shoutouts or paid pinned posts.
- Offering referral rewards like “Get ₹200 CAD off for every friend you bring.”
2. Collaborate with University Clubs and Cultural Societies
Most Canadian universities have or South Asian student associations. Partner with them during events like:
- Diwali nights: Set up a scented candle stall or perfume sampler table.
- Holi or Navratri festivals: Offer themed treats or fusion bakery items.
- Freshers’ week: Give away samples in welcome kits or sponsor part of the event.
These clubs are always looking for sponsors, giveaways, and local vendors that resonate with the community.
3. Use Instagram Reels & Collabs with Micro-Influencers
On Instagram, connect with Desi lifestyle or food creators who post in Canada. A well-shot 15-second reel of your product being used or unboxed, with trending music and aesthetics, can go viral within your target audience. Look for influencers with:
- 3,000–10,000 followers for high engagement
- Shared cultural roots (Gujarati, Punjabi, Tamil, etc.)
- Past brand collabs or product review content
4. Partner with Local Grocery Stores or Cafés
Many stores in cities like Brampton, Surrey, or Mississauga are open to helping fellow students. You can:
- Sell your candles or baked goods on consignment.
- Leave your business cards or flyers at the counter.
- Offer a sample tray of your items for weekend crowd tastings.
This boosts visibility in the broader community beyond the campus bubble.
5. Launch Product Drops Around Cultural Dates
Create urgency and cultural relevance by aligning your marketing calendar with key festivals (localization examples):
| Festival | Business Opportunity | Promotion Strategy |
|---|---|---|
| Diwali (Oct–Nov) | Limited-edition scented candles, mithai-inspired cupcakes | “Festival Gifting Box” pre-orders with group discounts |
| Holi (March) | Colourful fusion pastries or natural perfumes | Reels + “Buy 2, Get 1 Free” campaign in WhatsApp groups |
| Navratri/Garba Nights | Light snacks or vegan treats, perfume samplers | Pop-up booths at university-hosted events |
6. Offer Student-Only Discounts and Loyalty Perks
Price sensitivity is real in student communities. Win loyalty by offering:
- “Student ID = 10% Off” promotions
- Prepaid loyalty cards or stamp cards for bakeries
- “Pay what you want” pricing for your first 20 customers
Every satisfied buyer becomes a micro-ambassador. The more local, the more likely they’ll promote you organically.
Why Students in Canada Are Uniquely Positioned to Succeed at Home-Based Businesses
Access to Two Markets at Once: Cultural Roots + Global Reach:
You understand culture and preferences, and now you’re immersed in Canada’s diverse consumer habits. This dual insight enables you to craft products with global appeal yet rooted in tradition, perfect for multicultural marketplaces.
You’re Already in a Micro-Test Market: Your Student Network:
Your student circle is your first customer base. Use it to test pricing, packaging, and product ideas without formal marketing costs.
Students Are Naturally DIYers, That’s a Business Skill:
From fixing laptops to cooking on a budget, you already operate in a homemaker occupation mindset. This hands-on experience naturally translates to running a lean and sustainable business.
Built-In Cultural Calendar (Example) for Marketing Opportunities:
Festivals like Diwali, Holi, Eid, or Raksha Bandhan are perfect for limited edition product launches and seasonal promotions that resonate with your target audience.
You Already Speak the Language of Hustle:
Whether it’s managing classes, part-time jobs, or sending money home, students in Canada are seasoned multitaskers. That’s the backbone of every successful entrepreneur.
Final Thoughts: Build Income, Skills, and a Community From Home
From selling popular candles to crafting desserts that remind people of home, the opportunities for students in Canada to turn creative hobbies into income are endless. These ventures not only provide financial support but also offer valuable entrepreneurial experience. As you study, live, and grow in Canada, consider turning your spare time into a launchpad for long-term success. Every small step you take today could be the beginning of something big.

Frequently Asked Questions (FAQs):
1. Can I legally sell homemade bakery items from my apartment in Canada?
Yes, but it depends on the province. For example, in Ontario, you can operate under the “Low-Risk Home-Based Food Business” rule. Always check your local health unit for guidelines.
2. What are the best platforms to sell handmade candles as a student?
Instagram, Etsy, and Facebook Marketplace are great starting points. For local exposure, try university pop-up events or Desi cultural fairs.
3. How much investment do I need to start a homemade perfume business?
You can begin with as little as CAD 150–300, including essential oils, alcohol, bottles, and a beginner perfume making course.
4. How do I find customers in Canada for my products?
Tap into student groups on WhatsApp, Instagram hashtags like #DesiInCanada, and student association mailing lists.
5. What is the best way to ensure repeat business from university students?
Offer combo deals, loyalty discounts, and personalised products (e.g., custom fragrances or Diwali-themed bakery boxes) to keep customers engaged.
Here is a Sample Homemade Business by Taylah Rose:
References:
https://www.projectvanity.com/projectvanity/formula-ingredients-to-make-perfume-philippines
https://creative-formulas.com/categories/perfume-formulas/
https://livesimply.me/diy-homemade-candles-natural-lavender-rosemary-scent/
https://www.shopify.com/blog/how-to-make-candles
https://homebakers.co.in/become-a-home-baker/

Sonia specializes in the Canadian education system, from K–12 admissions to college and university placements for international students. With hands-on experience working with schools, education consultants, and immigration advisors, she provides clear, practical advice on visas, guardianship, academic programs, and student life in Canada.


